A quick post because I've been slacking (blog-wise anyway) ... Here's the ATV sized "road grader" I made. It's not a real heavy duty but it works pretty good for the sand and gravel I'm using it on. I was originally going to put actuators front and back, but I realized it was more simple to have the front lift high enough that the fixed rear wheels engage. Plus, now I have an extra actuator so I can add retractable york rake or something. I have video of it action... if I can find it. The lawn mower was just to test it.
Sunday, June 22, 2008
Friday, April 18, 2008
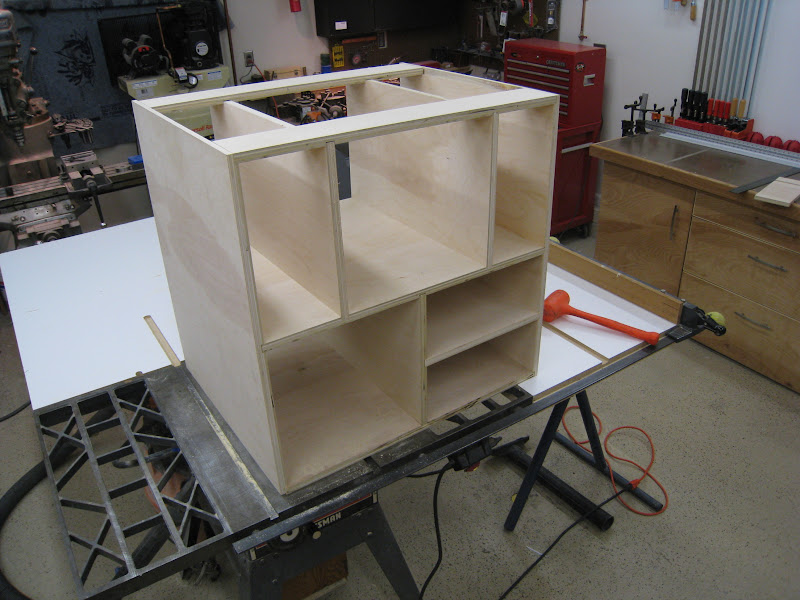
Base Complete
First a little side note: I found another great free tool to use with Sketchup. It is a free renderer called Kerkythea (kirk-ih-thea). That way I can make really pretty pictures of the projects a may finish someday :)
Anyway I finished the drawers and such for the base.
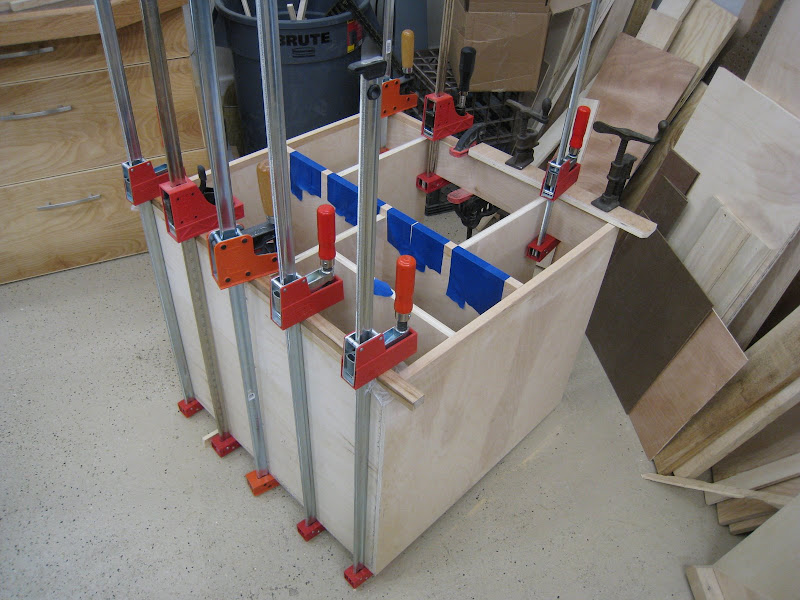

The faceframe is made from some of my own cherry (almost 2 years of air drying). This stuff is quarter-sawn and you can see some nice ray fleck in the close-up.


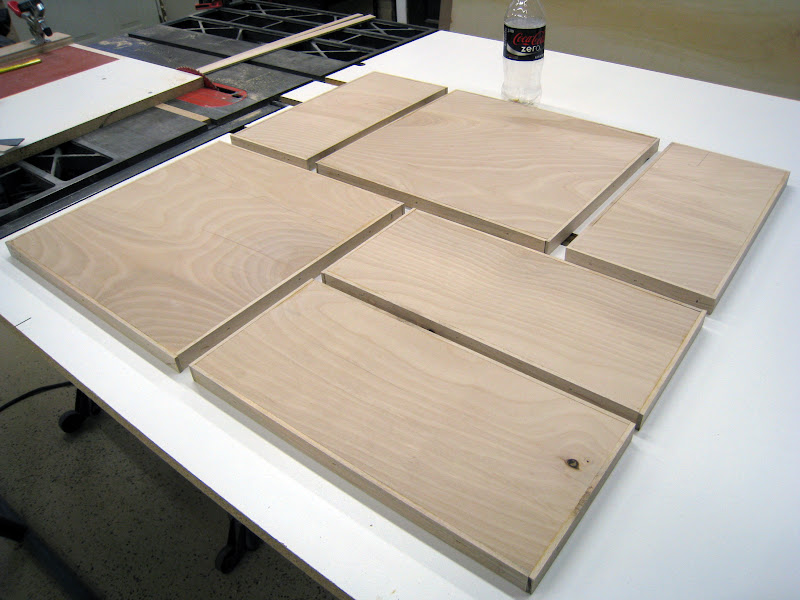
Again I was able to use my own maple for the drawer fronts edge banding:


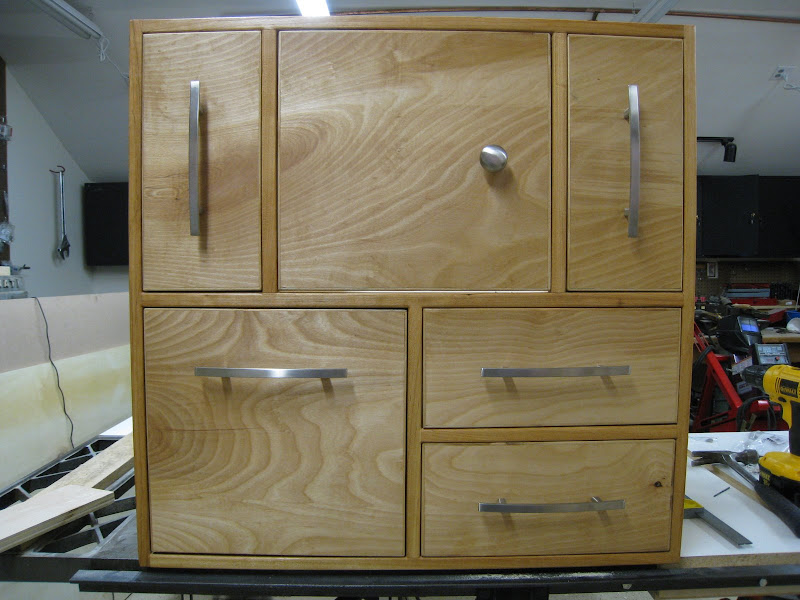
Then I added a couple coats of Danish Oil and some hardware to match the miter bench.

The torsion style top is next...
Anyway I finished the drawers and such for the base.
The faceframe is made from some of my own cherry (almost 2 years of air drying). This stuff is quarter-sawn and you can see some nice ray fleck in the close-up.
Again I was able to use my own maple for the drawer fronts edge banding:
Then I added a couple coats of Danish Oil and some hardware to match the miter bench.
The torsion style top is next...
Saturday, March 29, 2008
Slight Diversion
I couldn't resist making the router plate for this router table. Now that this is done, almost, I can build the top around it.
Sunday, March 16, 2008
Friday, March 14, 2008
Router Table Plan
I figure I'll try a torsion box style top on this. The style is a cross between Norm Abrams and a couple others I found on Flicker and LumberJocks. I can't really add the router plate insert until I know what size it is. Here is the sketchup File: router-table.skp
Wednesday, March 12, 2008
Monday, March 03, 2008
Planer Refurb
Another 3 week project that took a year to complete :) 60 bucks at auction and quite a bit of labor. The whole gallery can be viewed here: Web Album (click the little bubble for a brief caption)
Test Run: 3HP... Pine... HAHAHA!
Test Run: 3HP... Pine... HAHAHA!
Tuesday, February 26, 2008
New Top
Well, I put the hardboard top and trim on, set up a box jig, and put together a few practice joints. Now I can start putting the drawers together.
 Made a few mistakes on the first box jig. The key is to make sure the dado, the pin, and the space between them is EXACTLY the same. During the first attempt I gave a light sanding to the pin to get it to fit. That made it so the joint was to tight to fit together, and the front and side of the corner ended up at different heights. So, unlike the picture below, the 2 pieces wouldn't have gone together (without a ton of force), and the piece on the right would be shifted down by a 16th of an inch or so.

 Masonite top and flush mounted oak trim.

Ripped a couple of 3" strips of oak, bevel cut them to fit, and rounded the edges with the router.


 Flush trimmed the masonite to the existing top instead of trying to cut it to fit.
 The Box of screws on the left was $4.19 at HomeDepot. The 7 pounds of screws on the right were $18.43 at Hiawatha Fasteners.


 Made a few mistakes on the first box jig. The key is to make sure the dado, the pin, and the space between them is EXACTLY the same. During the first attempt I gave a light sanding to the pin to get it to fit. That made it so the joint was to tight to fit together, and the front and side of the corner ended up at different heights. So, unlike the picture below, the 2 pieces wouldn't have gone together (without a ton of force), and the piece on the right would be shifted down by a 16th of an inch or so.
 Masonite top and flush mounted oak trim.
Ripped a couple of 3" strips of oak, bevel cut them to fit, and rounded the edges with the router.


 Flush trimmed the masonite to the existing top instead of trying to cut it to fit.
 The Box of screws on the left was $4.19 at HomeDepot. The 7 pounds of screws on the right were $18.43 at Hiawatha Fasteners.
Monday, February 25, 2008
From Google Sketchup to the real world
Masonite and trim next, then it's time to make some drawers...
 DOH!
DOH!


 DOH!
DOH!


Monday, February 18, 2008
Bench and Cabinets
On to the next project now that the planer is complete , I'll post lots of those pics later. I plan making the bench (a hutch really, thanks Norm) below as well some cabinets . Should be some good practice for the house(s). As usual I have 10 preliminary step to do first.
 Step number one... turn a POS craftsman into a cabinet saw, ya right ;)
  First I built an outfeed table to support cutting large sheets. Boy I'm glad I went to those auctions and picked up some cheap steel :) The angle iron provides a ledge to attach the outfeed table.
 I actually cut the legs from some of the maple I had drying on the property, which I had to trek through the snow to get :o. It's probably not nearly dry enough, but it'll be interesting to see how it survives. Oh, and I had to create a taper jig to cut them. Well, I didn't have to, but...
 The next use for my auction steel is to extend the width of the table saw. It just so happens that the cheapo fence is simple 1x1 angle iron which I just happen to have !-)
 Once the fences were extended, I created another melamine surface to fit between them.
This tenoning jig wasn't really a prerequisite to the bench, but I had to "dial in" the table anyway, and it will come in handy eventually. I grabbed the plans from an old Shop Notes magazine (slightly improved). It's nice because you can cut both sides of the tenon without having to rotate the workpiece.


Now the BIG DOG, a Milwaukee 5625-20: 3 1/2 HP swinging a 3 1/2" raised panel bit ... oh oh oh . This will go in the router table that will make up the right side of the work hutch. raised panel bit and a cope and stick combo bit.
 Just a little bigger than the 1/2 HP next to it ;)


 Step number one... turn a POS craftsman into a cabinet saw, ya right ;)
  First I built an outfeed table to support cutting large sheets. Boy I'm glad I went to those auctions and picked up some cheap steel :) The angle iron provides a ledge to attach the outfeed table.
 I actually cut the legs from some of the maple I had drying on the property, which I had to trek through the snow to get :o. It's probably not nearly dry enough, but it'll be interesting to see how it survives. Oh, and I had to create a taper jig to cut them. Well, I didn't have to, but...
 The next use for my auction steel is to extend the width of the table saw. It just so happens that the cheapo fence is simple 1x1 angle iron which I just happen to have !-)
 Once the fences were extended, I created another melamine surface to fit between them.
This tenoning jig wasn't really a prerequisite to the bench, but I had to "dial in" the table anyway, and it will come in handy eventually. I grabbed the plans from an old Shop Notes magazine (slightly improved). It's nice because you can cut both sides of the tenon without having to rotate the workpiece.


Now the BIG DOG, a Milwaukee 5625-20: 3 1/2 HP swinging a 3 1/2" raised panel bit ... oh oh oh . This will go in the router table that will make up the right side of the work hutch.
 raised panel bit and a cope and stick combo bit.
 Just a little bigger than the 1/2 HP next to it ;)
Thursday, January 17, 2008
More Chilibowl Pictures
Indoor 1/4 mile track at the Chilibowl:
 MANY multi car teams...
 alot of nice ass... cars
So it ONLY costs $8000 to race? ;)
 One of Jason Leffler's cars ran(FAST) what was basically a motorcycle wheel. One of his other cars Won the Chilibowl, Not bad.


 This was probably the smallest trailer...

J.J. Yeley (47) choked on Saturday, well most of the weekend actually. He spun out, hit the cone on the restart (black flag), then spun out a second time. 2 strikes and you're out, so he never finished. This videos are smaller than I thought... JJ's the black car/white 47 near the back.
Tony Stewart was beat by a 16 year old in one of his mains :)
Open face helmet and a tee shirt?!
Subscribe to:
Posts (Atom)